
ADAS Calibration Process: Step-by-Step Guide for Safe Driving
10/2/2025 · Auto Glass With Class
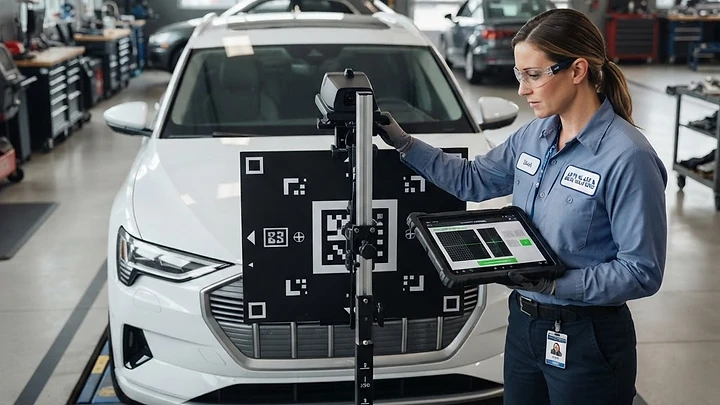
Calibrating an ADAS system is a precise process where the ADAS sensors and cameras are aligned or aimed and tested to ensure that the sensor can collect the most amount of data possible. The calibration process teaches the sensor where it is located on the vehicle and where it needs to be pointed.
# ADAS Calibration Process: Step-by-Step Guide for Safe Driving The ADAS calibration process is a critical procedure that ensures your vehicle's advanced driver assistance systems (ADAS) function correctly by aligning sensors, cameras, and radars to manufacturer specifications. These systems include features like automatic emergency braking, lane departure warnings, and adaptive cruise control, which rely on precise data to enhance road safety. At Auto Glass With Class, we adhere to OEM (original equipment manufacturer) procedures to deliver reliable results, especially after events like windshield replacements that can disrupt sensor alignment. ## Step 1: Pre-Scan & Vehicle Prep The first step is a thorough pre-scan using a factory or aftermarket scanner to identify all ADAS components and check for existing diagnostic trouble codes (DTCs). Vehicle preparation follows: park on a level surface, ensure the fuel tank is at least half full, inflate tires to OEM specs, and clean all sensors and cameras to remove dirt or debris. ## Step 2: Target Setup (Static Calibration) For static calibration, precise target setup is key. Position reflective boards, mats, or laser targets at exact distances and angles as specified by the vehicle's OEM. The shop must meet strict conditions: some setups need dim lighting, no reflective surfaces nearby, and enough space (usually 20×30 feet) to hold the vehicle and targets. ## Step 3: Calibration Execution With setup complete, execute the calibration via the scan tool, which communicates with the vehicle's ECU to adjust sensor parameters. For static methods, the tool guides alignment of cameras and radars. Dynamic calibration involves driving the vehicle at specified speeds (30-60 mph) on a clear road for 20-40 minutes, allowing the system to self-adjust using real-time data. ## Step 4: Verification & Post-Scan The final phase verifies success: perform a post-scan to confirm no DTCs remain and test ADAS features in a controlled manner. Document everything, including before-and-after reports, for insurance and warranty purposes. In summary, the ADAS calibration process safeguards modern driving by restoring system precision. At Auto Glass With Class, we make it hassle-free with mobile options in the Phoenix metro.
